
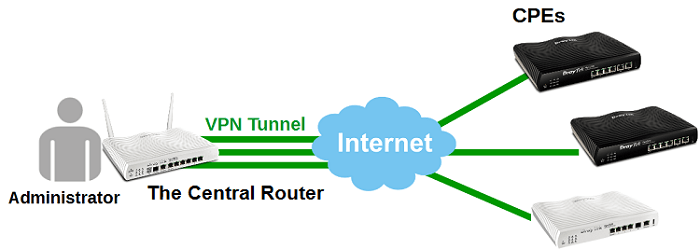
Central VPN Management (CVM) is an easier way to establish and manage VPN connections between several CPE (VPN clients). It allows Administrator on the CVM Router to: 1.Set up VPN connections with just one click, 2. Backup and restore CPE configurations, 3. Upgrade firmware for CPE, 4. Manage multiple CPEs simultaneously. Below we listed the models that supports CVM, and the maximum number of CPE they can manage.
| Model | Vigor2860, Vigor2925 | Vigor2960 | Vigor3900 |
| Max. CPE | 8 | 12 | 16 |
For CVM to work, it requires settings on both Central Router (VPN server) and the CPEs (VPN Clients), The following are the detailed instructions of using Vigor2860 and Vigor2925 as the central router. (For using CVM on Vigor2960 and Vigor3900, please refer to the article here.)
Configuring the Central Router
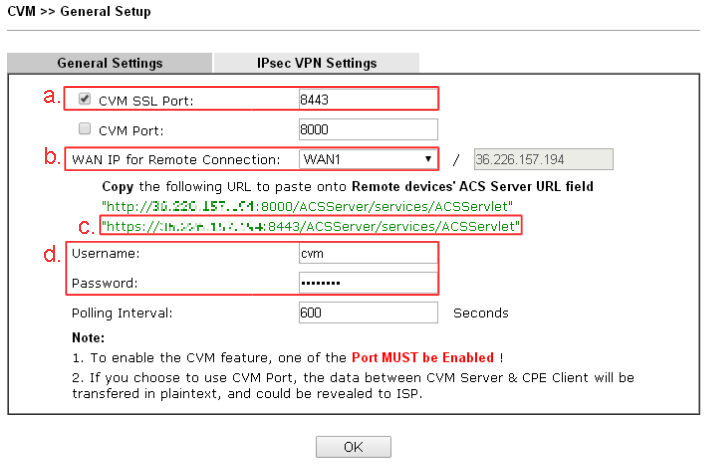
1. Go to Central VPN Management >> General Setup, in General Settings tab,
- Enable CVM Port, and enter a port number
- Select a WAN interfacefor Remote Connection.
- Write down the URL of ACS server, this will be used for settings on CPEs. (Note: URL with https and http is for CVM SSL Port and CVM Port respectively.)
- Define the Username and Password
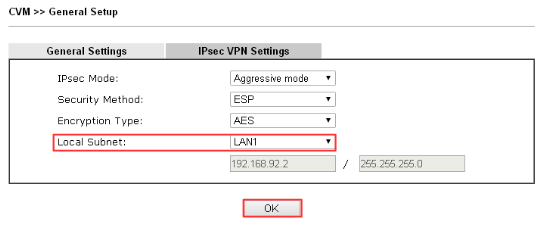
2. Go to IPsec tab, select the Local Subnet to establish VPN connection. Click OK to save.
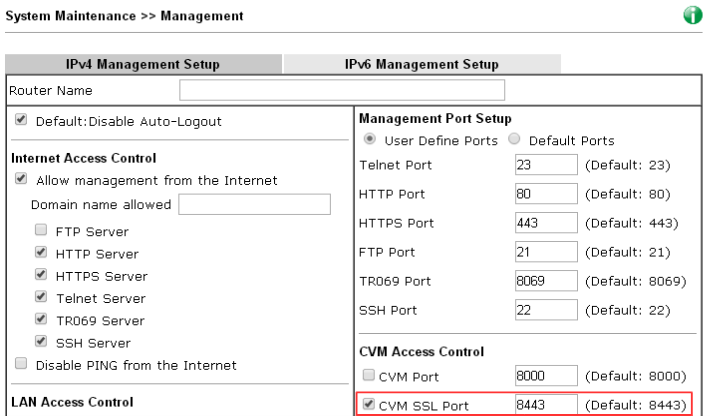
3. Go to System Maintenance >> Management, make sure the CVM Port is enabled.
Configuring the CPE router
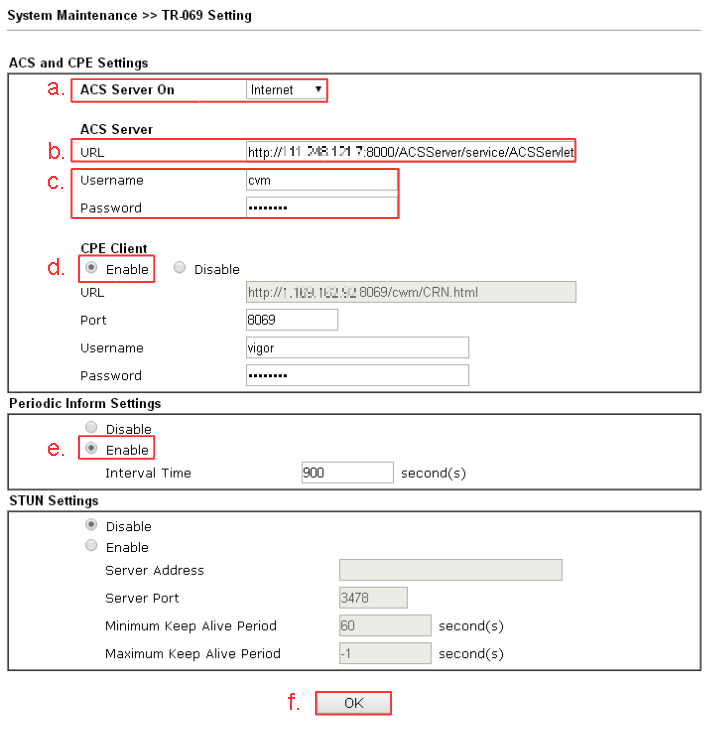
1. Go to System Maintenance >> TR-069
- Select ACS Server On Internet
- Enter the URL of ACS server copied from the central router.
- Enter Username and Password as the same as in CVM settings on the central router
- Enable CPE Client.
- Enable Periodic Inform Settings.
- Click OK to save
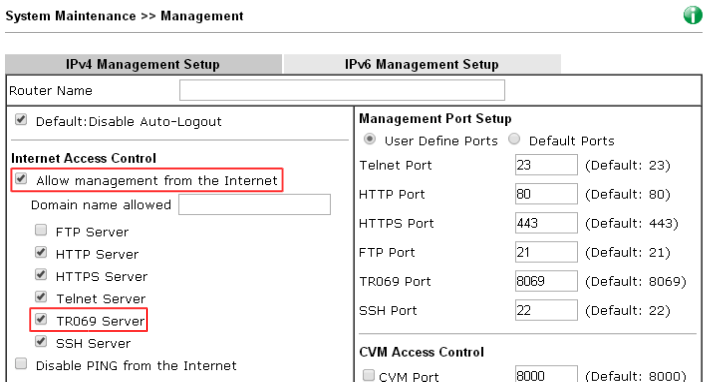
2. Go to System Maintenance >> Management, enable Allow management from the Internet and make sure TR069 server is enabled.
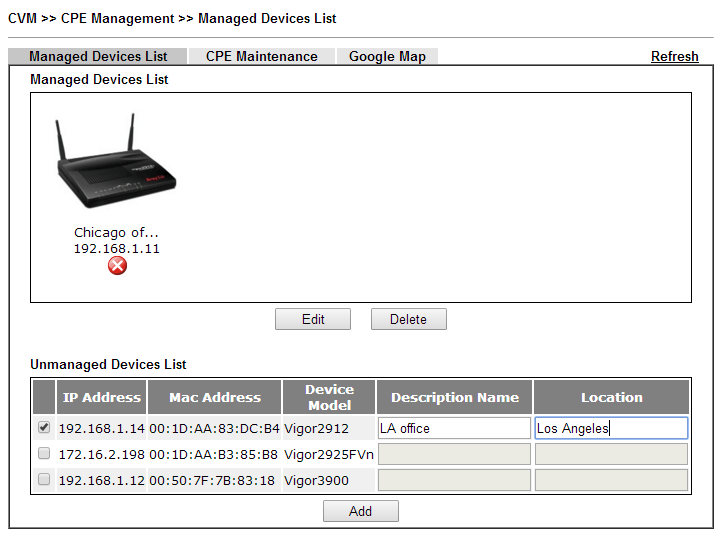
After the above configuration, the CPE will be registered to the Central Router, and we should see the device appears in the Unmanaged Device List of the Central Router.
Edit the Managed Device List
Now the Central Router should see the CPE on the Unmanaged Device List, which can be found from Central VPN Management >> CPE Management >> Managed Devices List. To add the CPE to Managed Device List,
- select the CPE device from Unmanaged Devices List,
- enter a Description Name and its Location,
- click Add to add it to Managed Devices List.
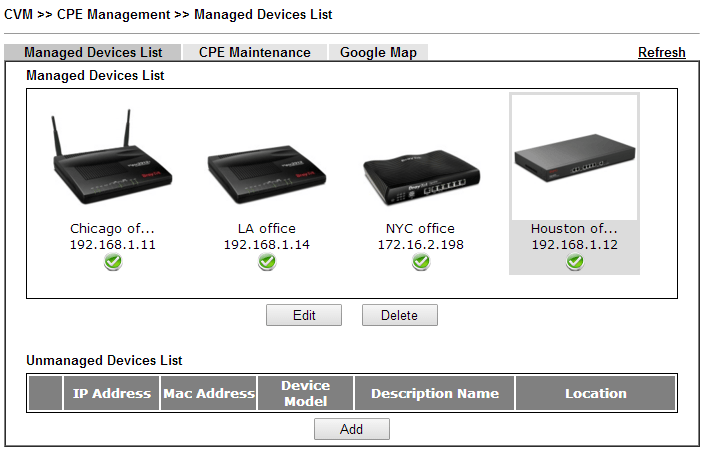
After that, the CPE will appear in Managed Devices List with its name and IP address. To check the detailed information, double-click on it.
If you have entered the exact address of the CPE, you may check its location in Google Map tab.

Establishing VPN connections
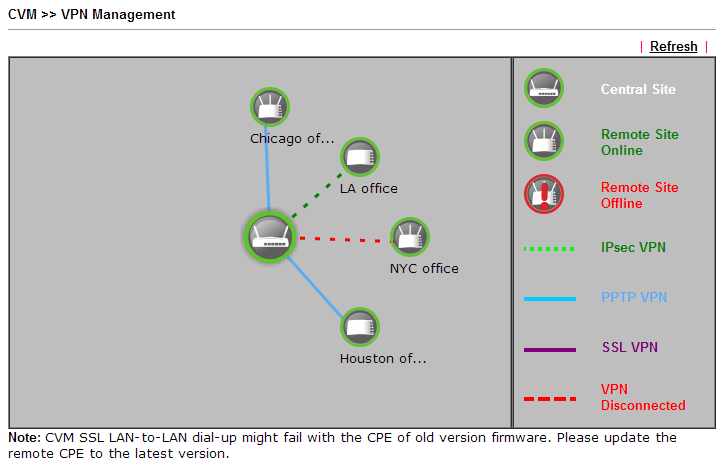
To establish VPN connection: Go to Central VPN Management >> VPN Management.
1. The VPN Management page shows all the devices in Managed Device List and their connection status.
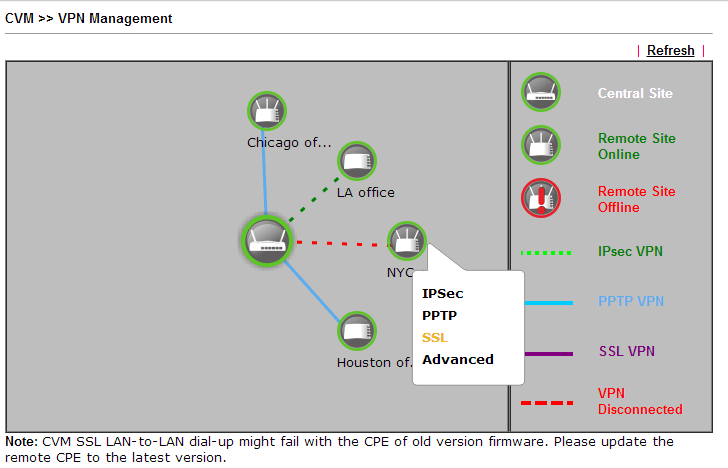
2. Click on a device to show the VPN type options, then click on one of the options to establish VPN connection. In PPTP, IPsec and SSL, the system will give a username and password automatically; however, Administrator could change the encryption methods by choosing “Advanced”.
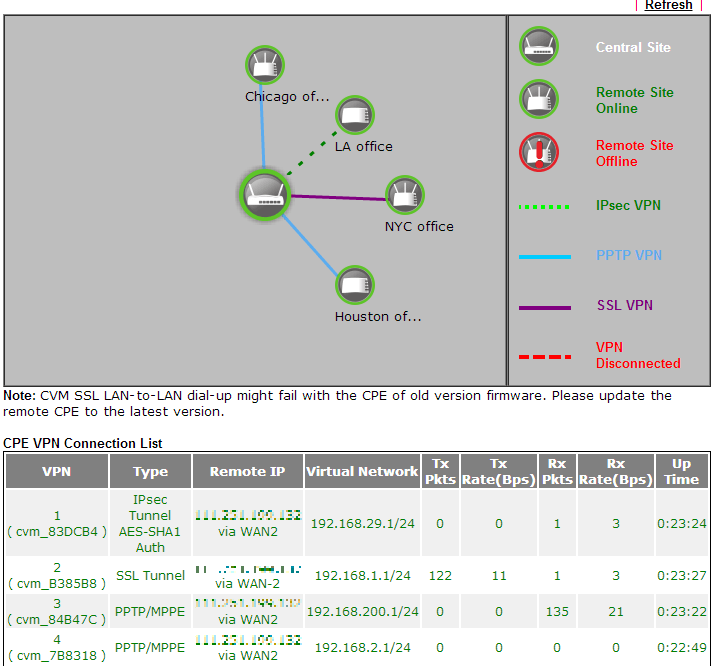
3. Wait a few seconds and refresh the page, we will see the VPN connection is on and the connection information is in the CPE VPN Connection List below.
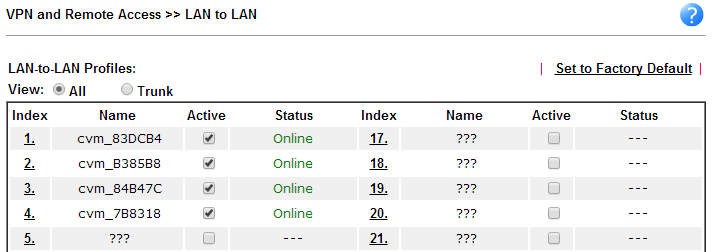
4. After that, both the CPE and central router will create a LAN-to-LAN profile in VPN and Remote Access >> LAN to LAN. Administrator could also change the VPN type in VPN Management page, and the settings will applied to the LAN-to-LAN profile automatically.
CPE Maintenance
In this part, we will demonstrate an example of CPE maintenance. Assuming Administrator wants a CPE to backup its configuration and stored in an USB once a day. This can be done from the central router with CVM.
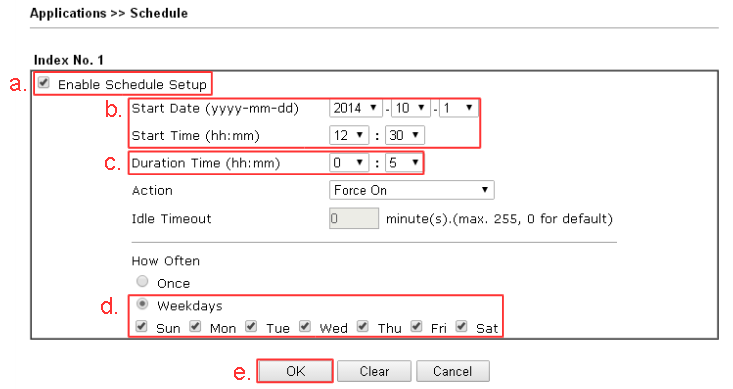
1. Create a schedule for the configuration backup: Go to Application >> Schedule, click on an index number to add a schedule profile.
- Enable Schedule Setup
- Select the Start Date and Start Time as the time for CPE to backup its configuration.
- Set Duration Time to 5 minutes.(Note: Longer duration gives router more retrying time in case that the CPE lose connection with the central router.)
- Select How Often does the CPE need to backup its configuration.
2. Go to Central VPN Management >> CPE Management >> CPE Maintenance, make sure there is a USB disk connected to the router.
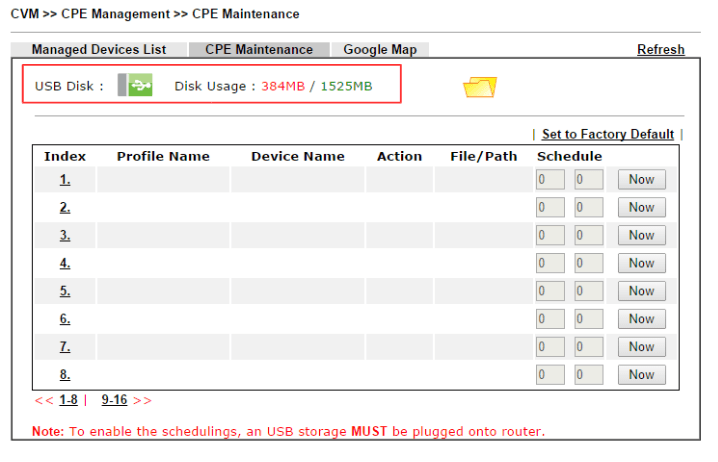
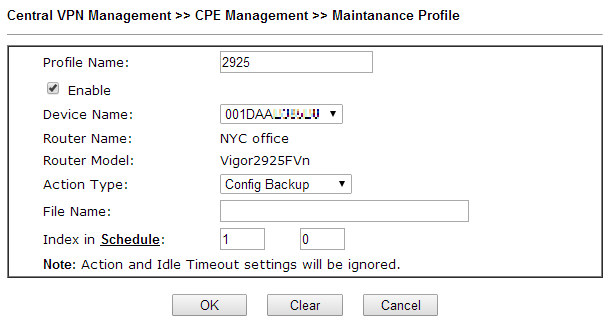
3. Add a CPE Maintenance profile: In the CPE Maintenance page, click on an index number to add a new profile.
- Enter the Profile Name.
- Enable this profile.
- For Device Name, select the MAC address of the CPE.
- Select Config Backup for Action Type
- Enter the Schedule profile index.
- Click OK to save
4. After the configuration backup, go to USB Application >> File Explorer to check if the configuration files has been saved successfully.
Quý Khách cần hỗ trợ kỹ thuật và giải pháp, vui lòng liên hệ
- Văn phòng TPHCM (028) 3925 3789
- Chi nhánh miền Bắc (024) 3781 5089
- Chi nhánh miền Trung (0236) 367 9515
- Hotline Hỗ Trợ Kỹ Thuật: 1900 633 641