
Thực hiện
A. VPN Server (Dial-In) Settings (Site trung tâm, có internet trực tiếp)
1. Điều chỉnh múi giờ Việt Nam
- Vào System Maintenance >> Time and Date, Time Zone chọn múi giờ Việt Nam, (GMT+07)>> nhấn OK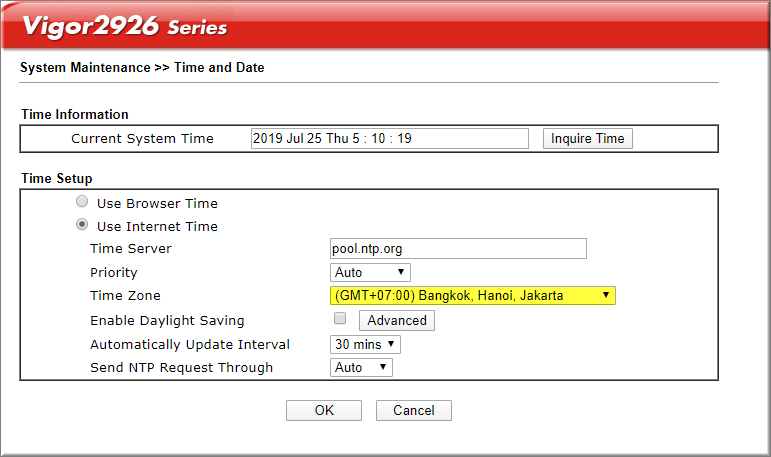
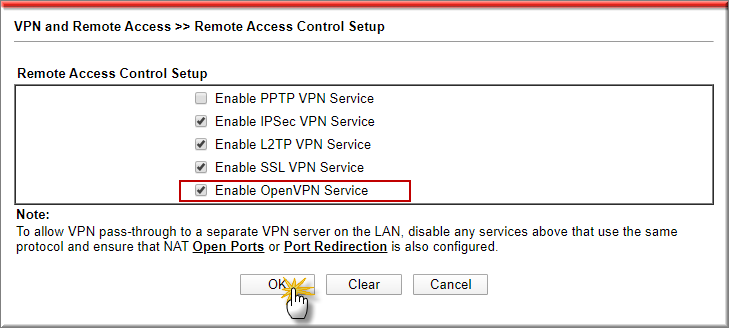
2. Vào VPN and Remote Access >> Remote Access Control, chọn Enable OpenVPN Service >> Nhấn OK, reboot khi có yêu cầu.
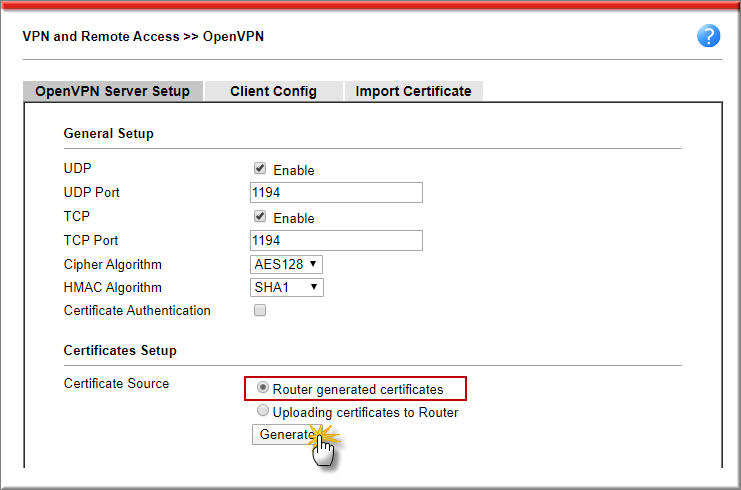
3. Vào VPN and Remote Access >> OpenVPN
Tại Tab, OpenVPN server setup, Certificate Source chọn Router Generated Certificates >> nhấn Generate.
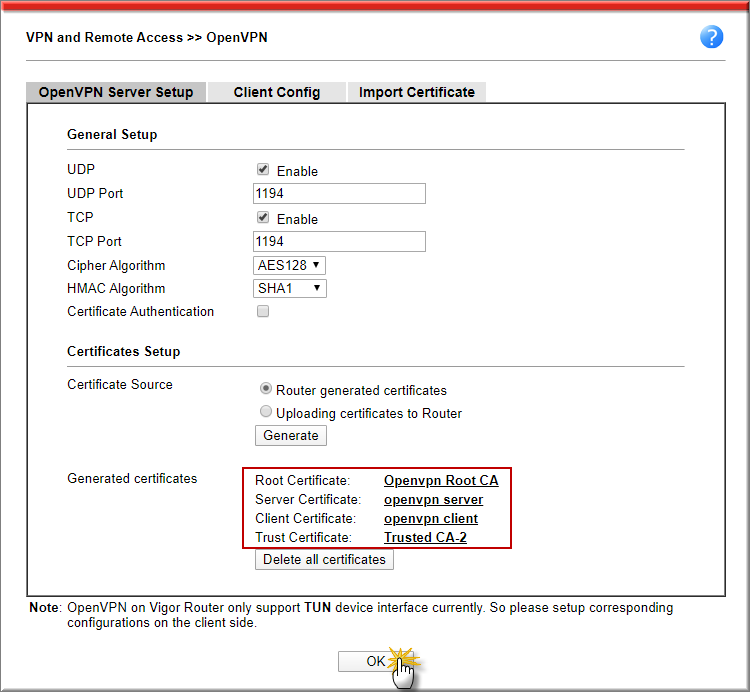
Chờ vài phút để router hoàn thành việc khởi tạo Certificate >> nhấn OK khi hoàn thành.
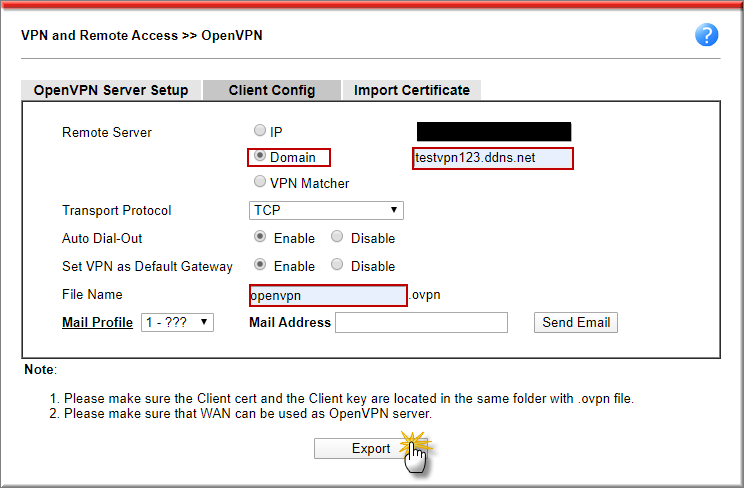
Tại Tab Client config
- Remote server:
- Chọn IP và WAN cho phép kết nối (nếu có IP tĩnh)
- Chọn Domain và điền tên miền cho phép kết nối nếu sử dụng tên miền động. Nếu chưa có tên miền, có thể đăng kí và sử dụng dịch vụ tên miền động DrayDDNS, cung cấp miễn phí có thiết bị Vigor: https://www.anphat.vn/quan-ly-thiet-bi-system-maintenance/huong-dan-kich-hoat-va-su-dung-drayddns
- File Name: Điền tên file (ví dụ openVPN)
- Nhấn Export
- Lưu file để sử dụng cấu hình trên router Client
3. Vào VPN and Remote Access >> LAN to LAN nhấn Index
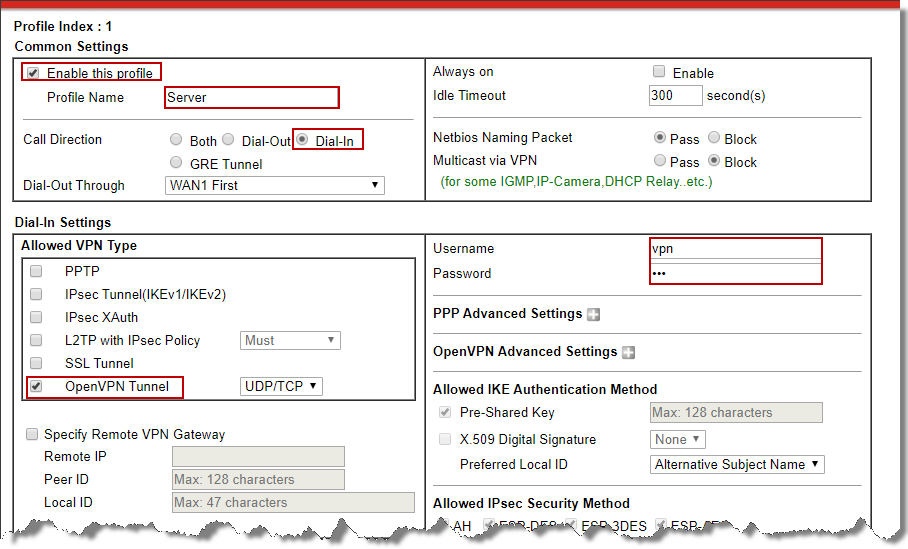
Tại Commont Settings
- Check Enable this profile
- Profile Name: Đặt tên Profile
- Call Direction: Chọn Dial- IN
Tại Dial- In Settings
- Allow Type VPN: Chọn OpenVPN tunnel
- Username/ Password: điền Username/ Password VPN
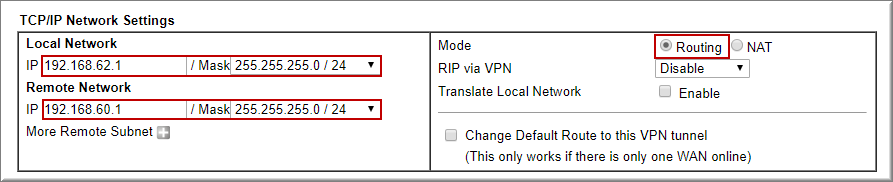
Tại TCP/IP Network Settings
- Local Network: Điền lớp mạng nội bộ (192.168.62.1/24)
- Remote Network: Điền lớp mạng đầu xa (192.168.60.1/24)
- Mode: chọn Routing
- Click OK
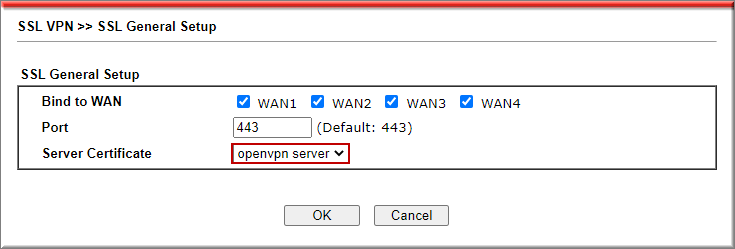
4. Vào VPN and Remote Access >> SSL VPN, Server Cetificate>> chọn openvpn server, nhấn OK
B. VPN Client (Dial-Out)
1. Vào VPN and Remote Access >> LAN to LAN
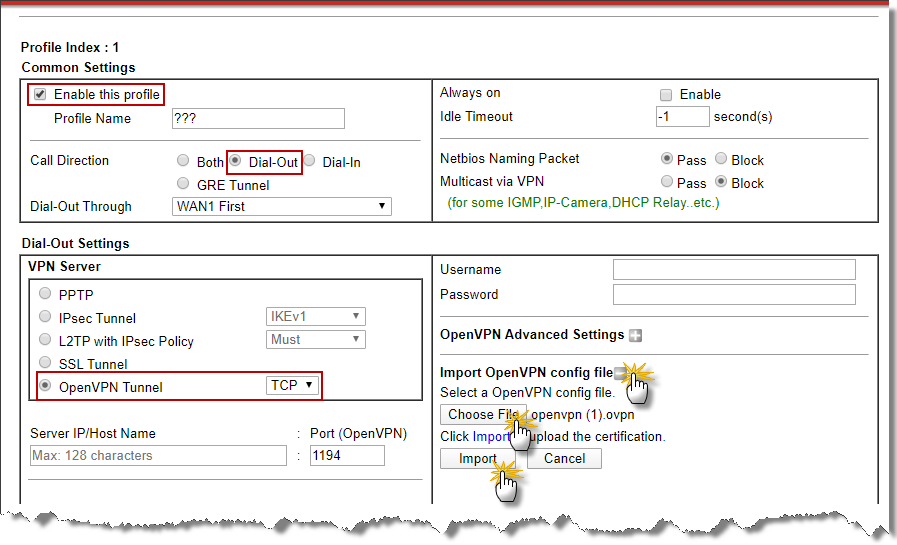
- Tại Common Settings
- Check Enable this Profile
- Call Direction: Chọn Dial- Out
- Check Always all
- Tại Dial- Out Setting
- VPN Server: chọn OpenVPN và Protocol kết nối TCP
- Username/ Password: điền Username/ Password VPN đã khai báo trên router server
- Nhấn (+) tại Import OpenVPN config File
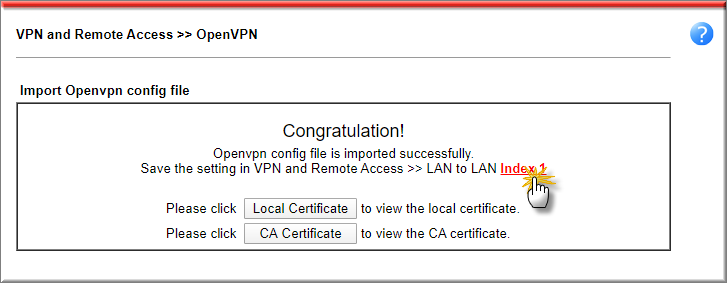
- Nhấn Choose File >> chọn file “openvpn” đã export trên router trung tâm >> nhấn Import
- Sau khi import thành công, Click Index 1, để trở lại cấu hình Profile VPN.
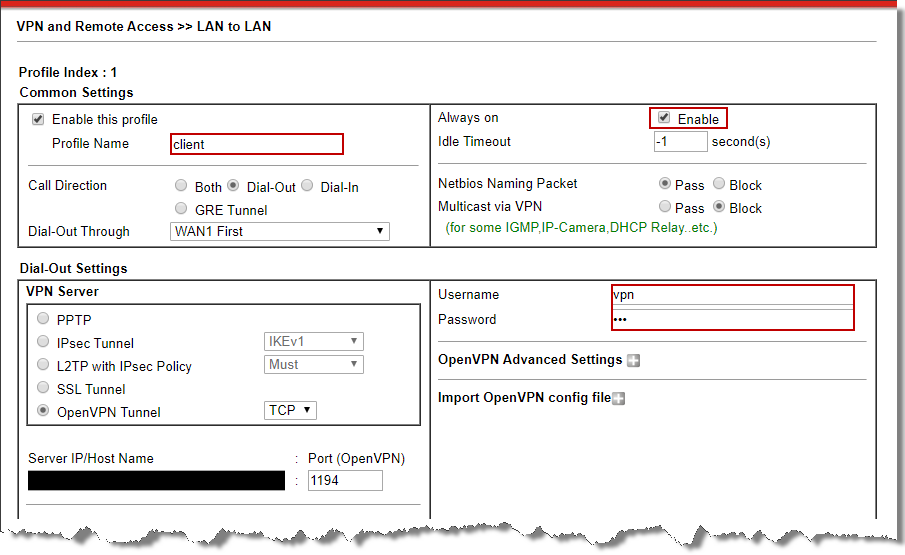
- Khi đó sẽ thấy các thông tin IP WAN port VPN đã được điền tự động.
- Profile Name: Đặt lại tên Profile VPN theo yêu cầu
- Check Always all
- Username/ Password: điền Username/ Password VPN đã khai báo trên router server
- Tại TCP/IP Network Setting
- Local Network IP: Điền lớp mạng nội bộ (192.168.60.1/24)
- Remote Network IP: Điền lớp mạng đầu xa (192.168.62.1/24)
- Mode: chọn Routing
- Nhấn OK

2. Vào VPN and Remote Access >> Connection Management, Kiểm tra kết nối VPN
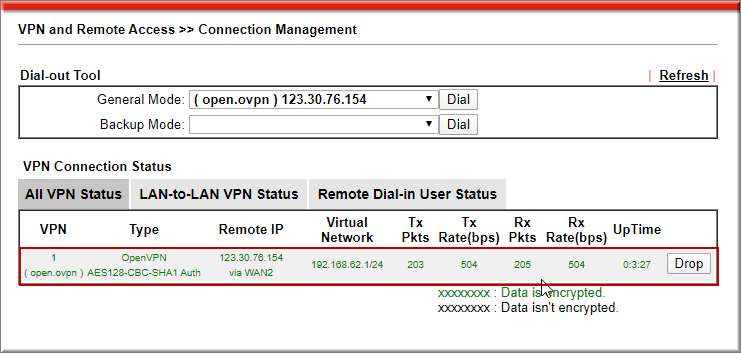
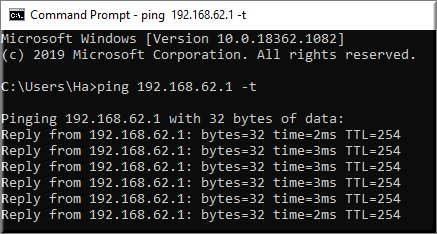
Thực hiện Ping IP đầu xa:
Ví dụ: trên máy tính ở Site client, ping IP router trung tâm.
Hãy liên lạc với chúng tôi để được hỗ trợ
Văn phòng TPHCM (028) 3925 3789
Chi nhánh miền Bắc (024) 3781 5089
Chi nhánh miền Trung (0236) 367 9515
Hotline Hỗ trợ Kỹ thuật: 1900.633.641