
Chuẩn bị:
- Đăng ký và sử dụng dịch vụ tên miền động DrayDDNS: https://www.anphat.vn/quan-ly-thiet-bi-system-maintenance/linux-huong-dan-kich-hoat-va-su-dung-drayddns
A. Trên Vigor2960/3900
1. Tạo Account VPN
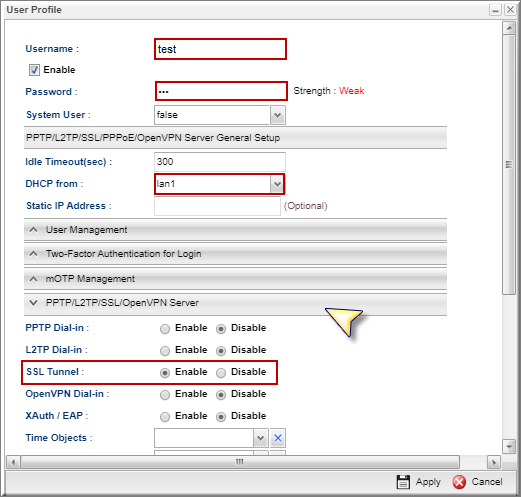
Vào User Management >> User Profile, nhấn Add tạo user
- Username :Điền Username VPN
- Check Enable
- Password :Điền Password VPN
- DHCP From :Chọn LAN cấp DHCP cho User VPN ( nếu hệ Router không cấp DHCP thì phải điền IP tĩnh cho User VPN tại Static IP Address)
- Nhán sổ PPTP/L2TP/SSL/PPPoE/ OpenVPN Server General Setup
- SSL VPN chọn Enable
- Nhấn Apply
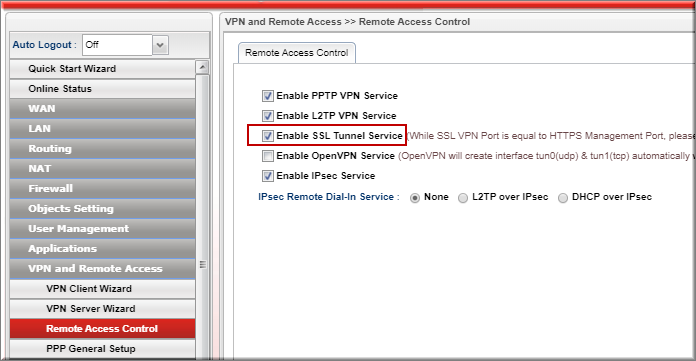
2. Cho phép kết nối SSL VPN
Vào VPN and Remote Access >> Remote Access Control
- Check Enable SSL VPN Service
- Nhấn Apply
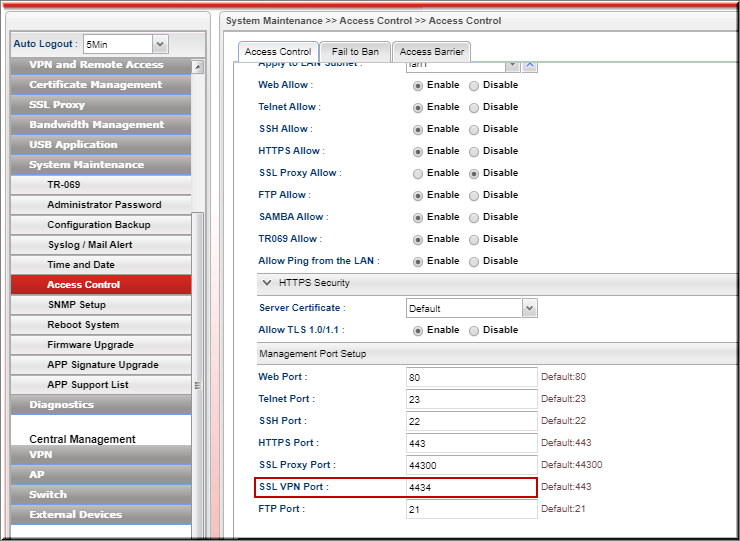
3. Đổi port SSL VPN
Vào System Maintemance >>Access Control
Tại Management Port Setup
- SSL VPN port : đổi port SSL VPN
- Nhấn Apply
B. Trên thiết bị Client
1. Cài đặt phần mềm DrayTek SmartVPN
Download bản Smart VPN Client tại: ![]()
2. Khởi động phần mềm
- Nhấn “Add” tạo Profile mới
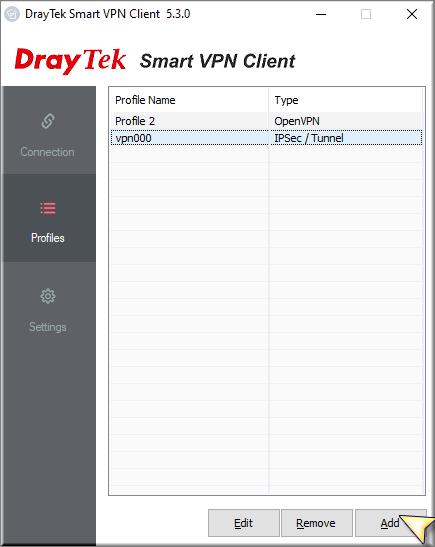
- Profile Name: Đặt tên Profile
- Type : Chọn mã hóa “SSL VPN Tunnel”
- IP or Host Name: Điền IP WAN hoặc tên miền
- Port: điền port SSL VPN đã đổi trên Vigor2912 ví dụ (4434)
- Username/password: điền Username/password đã cấu hình trên router
- Chọn “Advance Options”
- Fast SSL chọn “ON”
- Nhấn More
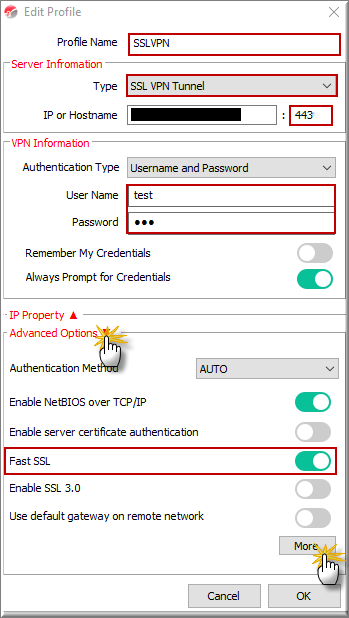
- Nhấn “OK” một lần nữa lưu profile VPN
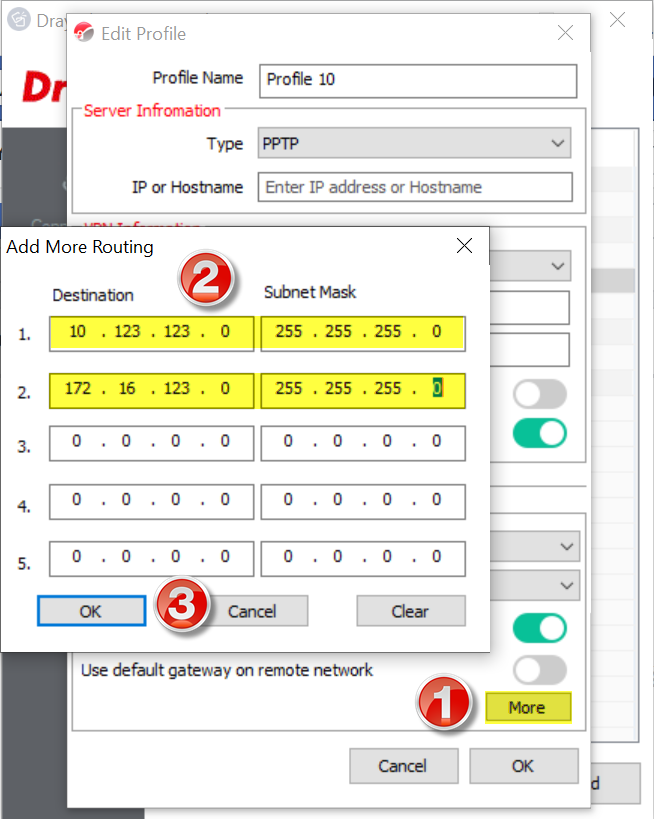
Lưu ý: Khi cần truy cập các lớp mạng (subnet) khác bên trong DrayTek, thì phải thêm các lớp mạng đó vào phần Advances Options >> "More" trên SmartVPN
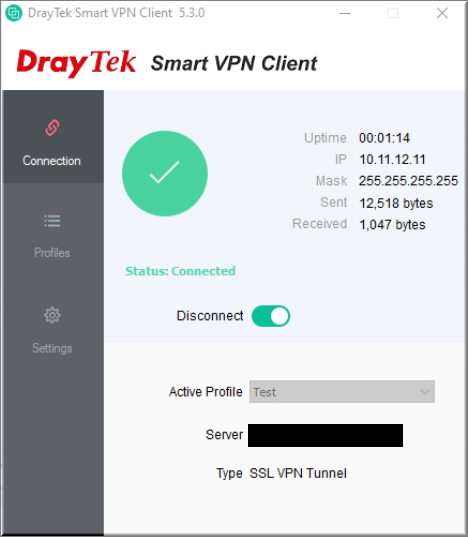
3. Thực hiện kết nối
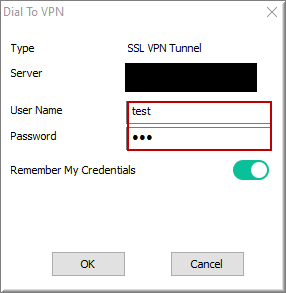
- Chọn Profile “SSL VPN” đã tạo>> nhấn “Connect”
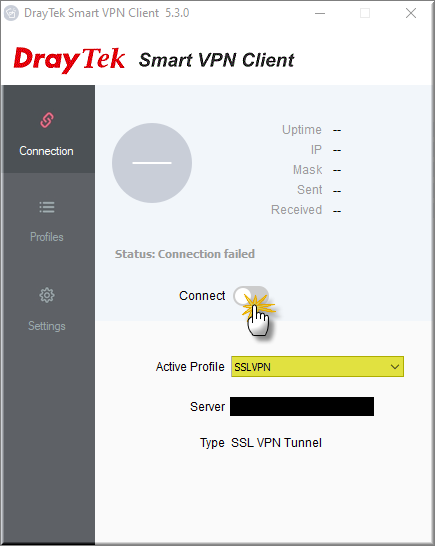
- Kiểm tra lại Username/ Password đã cấu hình
- Kiểm tra trạng thái kết nối

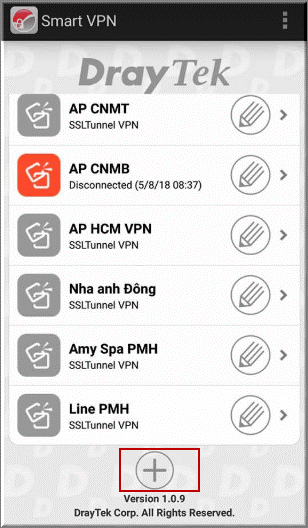
Điện thoại sử dụng SmartVPN client
Bước 1: Mở ứng ứng dụng SmartVPN client >> nhấn biểu tượng “+” để tạo profile
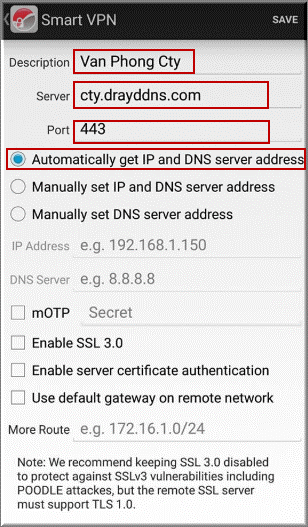
Bước 2: Điền thông tin VPN server
- Description: Đặt tên profile
- Server: Điền IPWAN/ tên miền router VPN server
- Port: 443 (port SSL VPN)
- Chọn “Automatically get IP and DNS server Address"
- Chọn Save
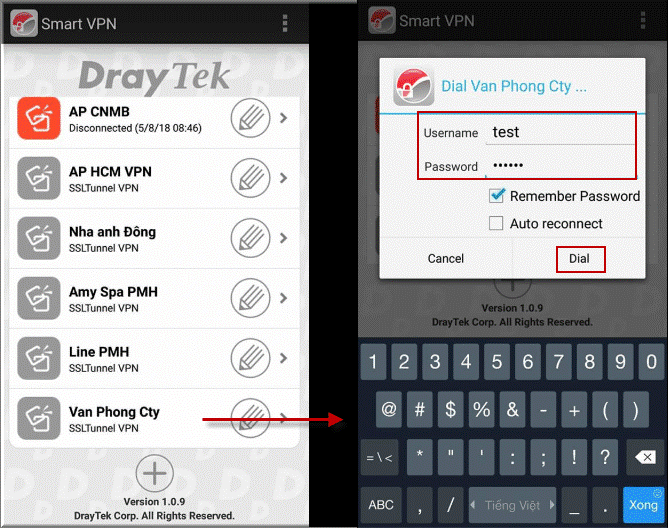
Bước 3: Thực hiện VPN
- Chọn profile VPN đã tạo để xuất hiện hộp thoại cấu hình account VPN
- Username /password: Điền username/ password đã tạo trên VPN server
- Chọn “Remember password” nếu muốn lưu password này cho các lầ kết nối sau
- Chọn “Dial”
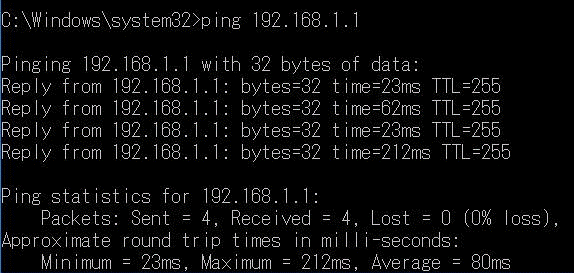
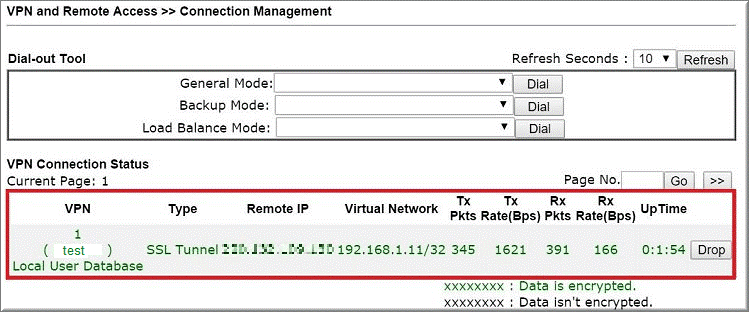
6. Kiểm tra kết nối
- Trên client, thực hiện ping địa chỉ IP LAN router, hoặc vào VPN and Remote Access >> Connection Management kiểm tra trạng thái kết nối
Văn phòng TPHCM (028) 3925 3789
Chi nhánh miền Bắc (024) 3781 5089
Chi nhánh miền Trung (0236) 367 9515
Hotline Hỗ Trợ Kỹ Thuật: 1900 633 641